

Shopify Flow
Notifylyst adds three Flow triggers. In Flow, start a new workflow, choose Select trigger, then pick CB Notifylyst.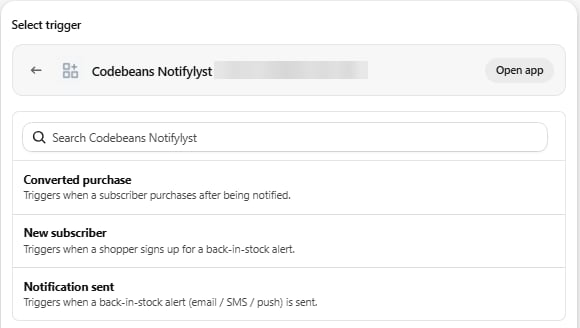
Notifylyst has no Flow actions — only triggers.
Ideas: tag customers who keep waiting for a sold-out line; post to Slack when a high-value product
converts; add shoppers who converted to a segment.
Webhooks
Settings → Webhooks sends events to n8n, Zapier, Make or your own endpoint the moment they happen.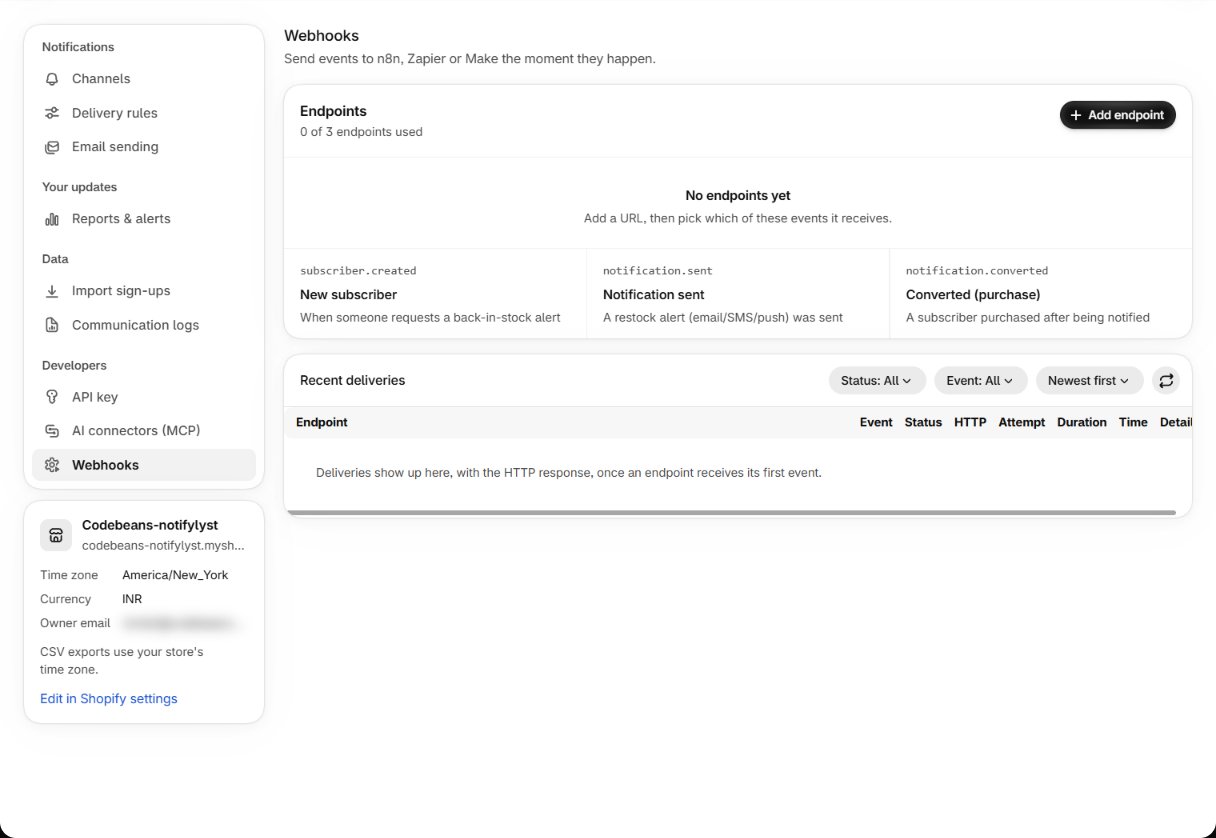
- Press Add endpoint, give it a Name and a Destination URL, and pick its events.
- New endpoints start off: use Send test to check your receiver, then switch it on.
- Recent deliveries shows each delivery with its HTTP status, attempt and time.
Pick Flow or webhooks for a job, not both. Two systems reacting to the same sign-up is the
usual cause of a shopper getting two of everything.
REST API
Settings → API key gives you a key to read your sign-up and notification data from your own systems — a dashboard, a warehouse system, a data warehouse. API documentation opens the reference.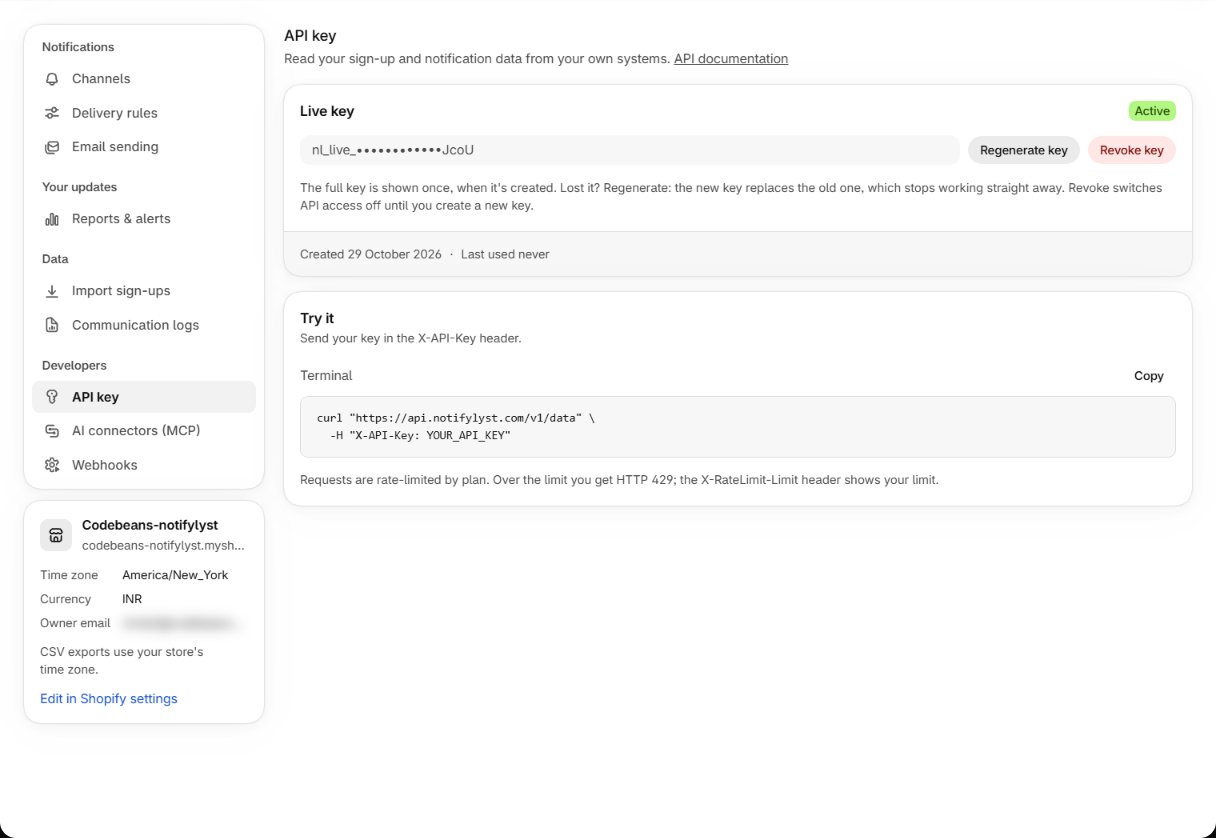
- The full key (starting
nl_live_) is shown once, when it’s created. Lost it? Regenerate key: the new key replaces the old one, which stops working straight away. - Revoke key switches API access off until you create a new key.
- Send the key in the
X-API-Keyheader, for example tohttps://api.notifylyst.com/v1/data. - Requests are rate-limited by plan. Over the limit you get HTTP 429; the
X-RateLimit-Limitheader shows your limit.
Sidekick
Notifylyst works with Shopify’s Sidekick assistant in your admin. Sidekick can:- answer questions about waiting demand — which products to restock first, who is waiting for a product, and your Notifylyst settings;
- prepare changes to your alert channels, report emails and restock rule. It opens Settings with the change filled in — you review it and press Save.
AI connector (MCP)
Connect Claude or another AI tool and ask in plain language — “which products are people waiting for that I already have stock of?” — with your confirmation needed before anything changes.AI connector guide
What it can reach, how to connect it, and how to limit what it may touch.
The web pixel
Notifylyst installs a Shopify web pixel. It does one thing: when a shopper arrives from an alert link and then completes checkout, it tells Notifylyst, so the order counts as Direct. It doesn’t track other browsing or widget use. Nothing to configure.Reference
Next: lookup tables for every setting and report.