

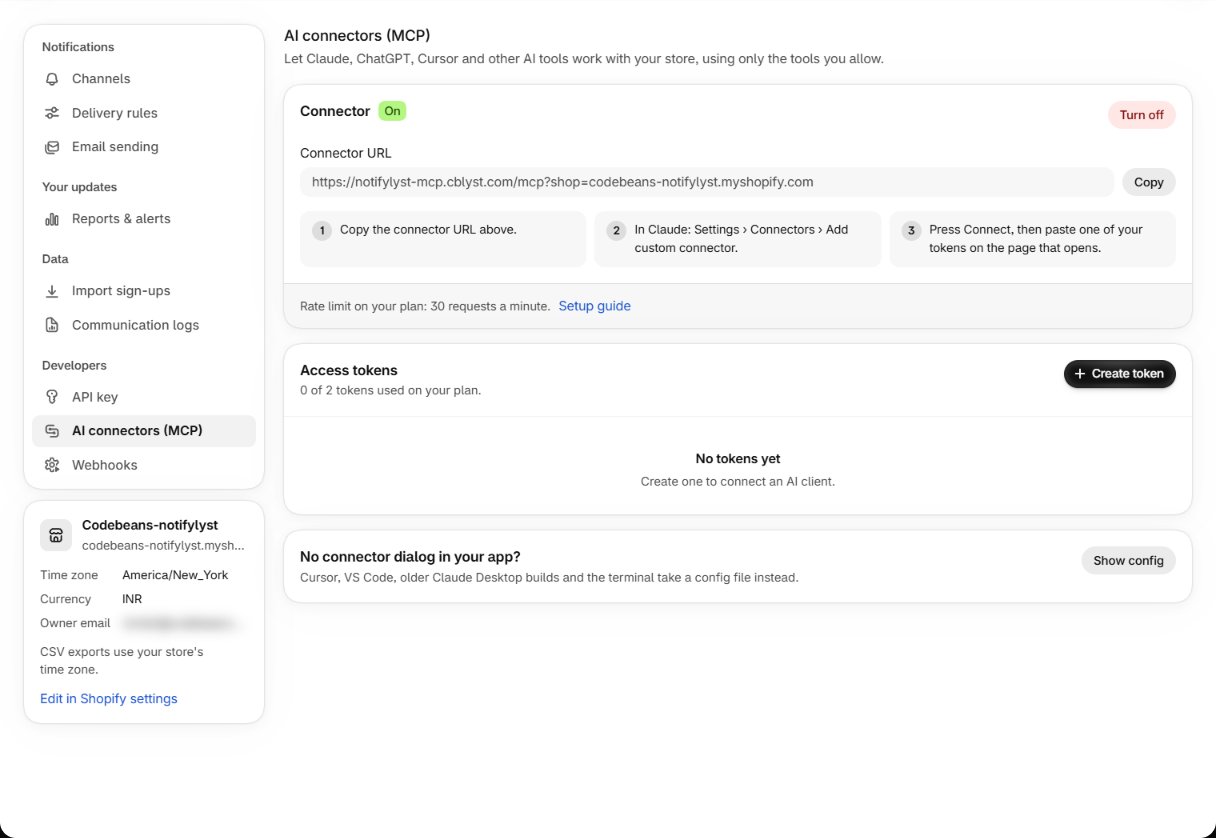
The Connector card
The top card is the store-wide switch and the address your clients connect to.
If the card says “The AI connector isn’t available for this store yet. Contact support…”, contact
Notifylyst support from inside the app.
Create a token
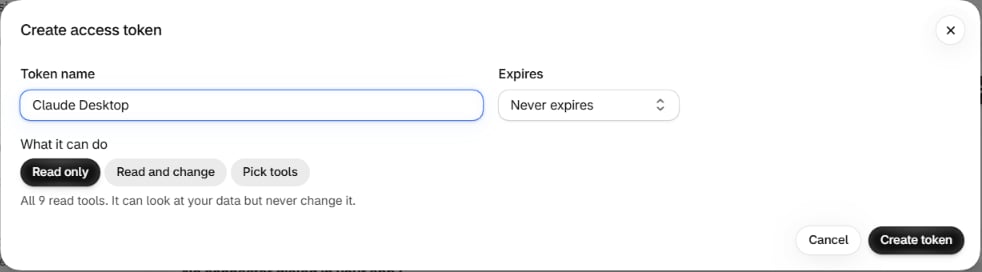
In the Access tokens card, press Create token. The Create access token dialog opens.1
Name it after the client
Fill in Token name — “Claude Desktop” tells you what to revoke six months from now. Left
empty, the token is called “AI Connector Key”.One token per client is the right habit: each is independently revocable, and Last used then
tells you which client has gone quiet.
2
Choose an expiry
Expires offers Never expires, 30 days, 60 days, 90 days or Custom date…. A
custom date opens an Expiry date picker; the token works until the end of that day, and the
date must be in the future.Set an expiry for anything temporary — an agency, a contractor, an experiment.
3
Choose what it can do
Under What it can do:
The app checks the token’s tools on every call, so a token can only ever use what you chose here.
See All 16 tools for what each one does before you decide.
Start with Read only. Nine read tools answer almost every question worth asking. Create a
second token with change tools later, once you know which actions you actually want an agent
taking.
Copy the token immediately
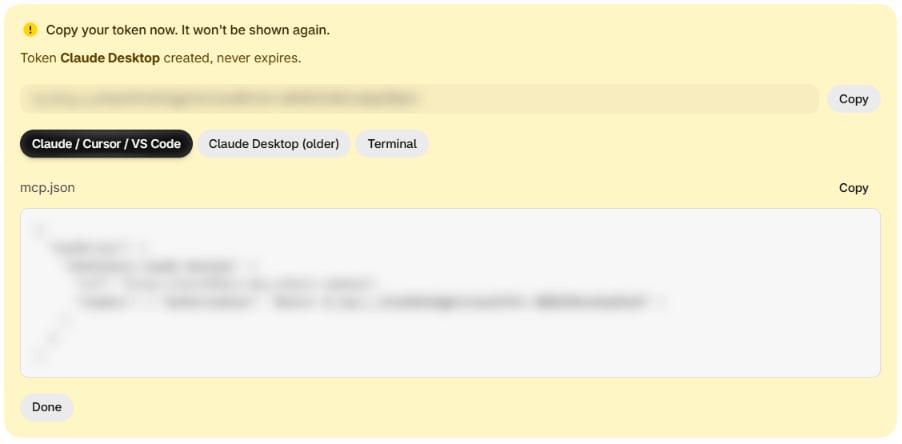
Right after you create it, a banner says “Copy your token now. It won’t be shown again.” It holds the token in a New token field, a switch for your AI client with a ready config block, and a Done button. The token starts withnl_mcp_. Notifylyst stores it hashed and keeps only the last four
characters for display, so it can never be shown again.
Never paste a token into a chat, a shared document, a ticket or a screenshot. Anyone holding
it has exactly the access you granted. If one leaks, press Regenerate — the old secret stops
working.
Managing tokens afterwards
The Access tokens table lists every token:
Plan limits
Your plan sets how many tokens you can have and how many requests a minute each one may make. The Access tokens card shows “X of N tokens used on your plan”. At the limit, Create token is disabled and the app says “Your plan allows up to N tokens. Revoke one to create another.” On a plan without the connector it says “Your plan does not include AI connector tokens. Upgrade to create one.”
Check the Plans page in the app for your plan’s current figures.